Category Archives: Soups

A Primer on Chili

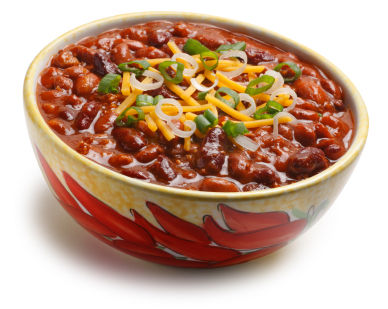
This is not a recipe for chili.  That’s not even my chili up there.  It’s someone else’s chili.  But I liked the bowl so I stole the picture.  It makes me want a chile pepper covered bowl just for putting chili in.  Hmm.  I think I just got the inspiration for my next project at Claytopia…

Anyway, I made chili last night during the weirdly ferocious January thunderstorm we had here in NW PA last night.  (Global warming anyone???)  I wasn’t really planning on doing chili for the blog, ever.  I don’t have an exact “my chili” recipe.  I use whatever I have on hand, usually.  Chili is comfort food.  It’s easy.  Everybody loves it.  It’s even better the next day.  And there’s a million and one ways to make it.  Which makes it perfect for a guide like this.

For years I made my chili one way and one way only:  with a McCormick Chili spice packet.  Which is totally fine, especially if you’re not real confident in the kitchen.   But here’s the great thing about chili – it’s hard to screw up.  With a couple of basic guidelines you can make your chili however you like, top it with whatever you like, and throw it on top of whatever you want.

Last night I made my chili without consulting anything, without having to hover over a recipe.  It is such a great feeling and I want to share that with you all so here goes.

For a small pot of chili (4ish servings) you need these elements as your base:

1 lb Meat.  This can be ground beef, “stew meat” (small cubes of chuck roast), ground turkey, ground pork, cut up sirloin, whatever.  Or, you don’t even have to use meat and just make it a vegetarian chili.  If you’re not using meat, double the beans.

Beans.  One can.  I use the “seasoned chili beans” but you can use any kind of beans you like.  Keep in mind that canned beans are pretty salty so you probably won’t need to add much, if any, salt to your finished chili.  If you don’t like beans you don’t have to use ’em.  But you do have to admit to yourself that you like your chili “Texas style”.  Take that as you will.

Tomato.  One (15ish oz) can minimum.  You can use diced tomatoes, tomato sauce, crushed tomatoes, whatever you have on hand.  I like to use one can each diced tomatoes and tomato sauce.  Or if you’re reading this in August and you have a bajillion tomatoes in your garden this is a good place to use them.

Onion.  One medium, diced.  Or you can use one onion’s worth of the dried onions you get in the spice aisleI think that’s like 1/4 cup.  Those are great in a pinch.   

Garlic.  Either a couple cloves, minced, or 1 tsp Garlic PowderAnd of course you can always use more or less to taste.  That goes for pretty much everything here, actually.

Chili Powder/Dried Chiles.  A good rule of thumb is 3 Tbsp Chili Powder per 1lb meat.  I’ve seen recipes with more so there’s room to add if you like.  Or you could decrease this amount if the flavor is more intense than you prefer.  But it is the primary flavor in chili so you really can’t go without it entirely.  I mean, you could.  But it really wouldn’t be chili then.  You can also use whole dried chiles for a more authentic southwest chili.  I don’t because it’s more expensive but whatever floats your boat.

Other things you can add but are not necessary:

Additional spices.  Start with 1 tsp of each.  That’s enough to give you a little taste without accidentally overpowering your chili with something that might not be something you end up liking that much.  I routinely add oregano (2 tsp) which is surprisingly nice with Tex-Mex stuff.  Cumin too, just a teaspoon.  I also now always add…wait for it…cocoa powder (1 tsp).  It’s the “secret ingredient” in Mexican moles (mow-lays) which gives them such an incredible depth of flavor without tasting chocolatey.  I’ve also seen chili recipes that use coffee to add a greater dimension of flavor.  If you throw in some cinnamon you’ve got Cincinnatti chili.  I could also totally see pouring in 1/4 cup of your favorite BBQ sauce.   This is where you get to play.  Have fun with it.

Diced green chiles.  Me likey.

Diced green bell pepper.  A very common addition.

Sliced jalapenos.  For those that like a lot of heat.

Corn flour.  Make a slurry with 2 parts corn flour to 1 part water and add it in at the end.  It will thicken up the chili if it’s on the thin side and also gives it a hearty, slightly corny taste.

Corn.  If you really like corn.

Method:

Heat a large skillet over Med-High heat.  Add meat and onions (and any other raw vegetables you might be adding), cooking until meat is browned and veggies are soft.  Add garlic and cook for another minute.  If you have a lot of grease, you can carefully drain that off now.

(At this point, if you wanted to, you could transfer everything to your slow cooker, add everything else, and leave it on high for a couple hours or on low for the whole day.)   Or finish it on the stove as described below.

Add spices and toast for another minute until fragrant.  Add tomatoes, beans, and anything else from a can.  Bring up to a boil, turn down the heat, cover and let simmer at least 20 minutes.

Top with anything you like.

Toppings can include:

Shredded Cheese (Cheddar and Monterrey Jack are particularly good)

Sliced green onions/diced red onion

Fresh Cilantro

Sour Cream (my fave right there, particularly with a spicy chili)

Sliced Jalapenos (HEAT!)

Fried Tortilla strips/chips

Crumbled Bacon

Hot Sauce

Potential uses beyond the bowl:

Chili Cheese Nachos.  Everything you love about chili and nachos on one plate.  Perfect for the big game.

Chili Cheese Dogs.  Messy but awesome.

Chili Cheese Stuffed Baked Potatoes.  Need I say more???

Cincinnatti Chili.  Cinnamon infused chili served over spaghetti with a sprinkling of cheddar on the top.

Creamy Chili Cheese Dip.  Spread a block of softened cream cheese evenly over the bottom of a glass baking dish.  Cover with about a cup of (preferably beanless) chili , sprinkle with  1/2 cup cheddar cheese and bake in the oven at 350 degrees until hot and bubbly, about 30 minutes.  Sprinkle with freshly chopped cilantro and serve with tortilla chips.  Nom.  I could (and have) eaten a half recipe of this by myself.

My favorite presentation:  Served atop buttered white rice with cornbread and honey butter.  Perrrrrrrrrfect.

Now go make some chili people!

Leave a comment

Filed under Main Dishes, Soups

Zuppa Toscana

So it’s like 8 degrees outside today or something ridiculous like that.  Brr.  So what to do for dinner?  Soup of course!  And today I have one of my favorites for you.  It’s one of my standards for busy weeknights and also a dish I’ve served proudly to company.  This would be my Zuppa Toscana.

Yep, that Zuppa Toscana.  The one from The Olive Garden that we all love so much?  The one that we get before dinner arrives and then sheepishly order a second bowl of and are then are too full to eat the actual meal we ordered?  That would be this.  I am a HUGE fan of this soup for a number of reasons:

1)  Everyone LOVES this soup.  I mean it.  Everyone.  Except for my 8 year old whom we know does not eat anything that is not some mixture of cheese, white flour, and sugar.  But other than her – seriously, everyone asks for this recipe.

2) It’s gluten free which means everyone in my house can eat it without making any modifications.

3) It’s super easy.  You make the whole thing in one pot in about half an hour.

4)It’s actually pretty healthy and lower calorie than you would expect.  With chicken broth as the base and a whopping 8 cups of antioxidant-rich kale, this soup is a winner all around.

5) It’s cheap.  No explanation necessary.

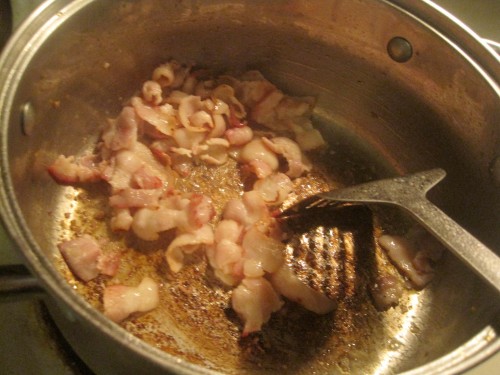
We’re gonna start by grabbing a large pot and frying up some bacon nice and crisp over medium heat.  I may have had the heat a bit too high to start here.  You’ll notice all the pieces have been cut into inch long bits to make it easier to fry them in the pot.  They’re just going to be crumbled in the end anyway.

Once the bacon’s done, remove it from the pot and set on a paper towel lined plate to drain.  Next we’re going to add 4 spicy Italian sausage patties.  We’re going for 1 1/2 cups total crumbled sausage.  I use our store brand (Wegmans) Spicy Italian Sausage Patties.    Pick a sausage that you love because it’s going to provide a lot of the flavor for your soup.  Just make sure it’s gluten free first if that is of concern to you.  Brown the sausage, remove to a bowl, and set aside for now.

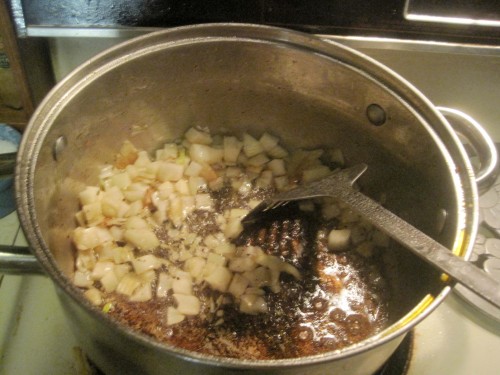
You’ve now got lots of wonderful brownness stuck to the bottom of your pot.  We’re going to saute some diced onion in all that mess to soak up the awesome flavor.  Oh, and three cloves of minced garlic.  Not shown.  Oops.  Add that in for the last 60 seconds of cook time.

Meanwhile, we’re going to take a few potatoes and slice them up thinly.  These are Yukon Golds, halved and then thinly sliced.

Terrible shot.  I know.  In for the sake of completeness only :p

We’re going to add our potatoes and 8 cups of chicken broth and bring our soup up to a boil over Medium High heat.  Obviously the soup in this shot is not boiling.  Why I even took this picture is beyond me.  Anyway.  Once boiling, turn down the heat to low and let simmer for about 10 minutes, or until the potatoes are fork tender.  The time will depend on how thinly your potatoes are sliced.

While our soup is cooking we’re gonna roughly chop up some kale.  I like a LOT of kale in my soup – like 8 cups.  You may say four is more than enough.  Just make sure the pieces are not so large that they can’t be picked up by a spoon.  This picture shows the pre-chopped kale.  This is the second batch to be chopped – I actually used at least twice the amount shown.

Now, add the bacon, sausage, and kale into your soup.  We only want to wilt the kale, not cook it.  That’s why it goes in at the very end.  It looks at first like there is way too much kale and then in a minute or so it will wilt and diminish into the rest of the soup.

Lastly we add  1/2 cup of heavy cream.  Stir the soup around and leave it on low heat for a few minutes to ensure it’s heated through.  We don’t want to bring it back up to a boil, just nice and steamy hot for serving.

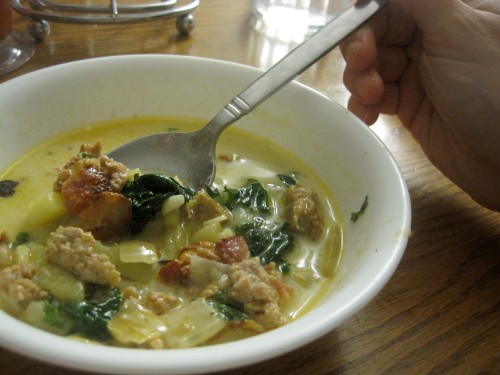
And voila!  Zuppa Toscana just like from the Olive Garden!  Quick, easy, cheap, and so so flavorful.  Hearty without being overly caloric, it’s the perfect wintertime dinner.  Serve with some crusty bread (gluten free of course, if that’s your thing) and maybe a hunk of good cheddar cheese and some crisp apples.  Divine!

Zuppa Toscana

6 slices bacon, pre-cut into 1″ bits

4 Spicy Italian Sausage Patties

1 medium onion, diced

3 garlic cloves, diced

4 Yukon Gold Potatoes, halved and thinly sliced

8 cups chicken broth

8 cups roughly chopped kale (or less to your taste)

1/2 cup heavy cream

Instructions:

Prepare your onions, potatoes, bacon, garlic, and kale.  Doing this now makes the whole process go smoother.

In a large pot over medium heat cook bacon until crisp.  Remove to a paper towel lined plate to drain.  Set aside.

Add sausage to pot, breaking up with a spatula until crumbled and browned.  Remove to a bowl and set aside.

Add diced onion, scraping the bottom with a spatula to loosen up the brown bits on the bottom of the pot.  Cook until onions are soft, about 5 minutes.  Add in the garlic for the last minute of cook time.

Add potatoes and chicken broth to pot and turn the heat up to medium-high.  Bring to a boil.  Turn the heat down to low, cover, and let simmer for 10 minutes, until potatoes are fork tender.

Add kale, sausage, and bacon to soup.  Let cook on low heat for about 2 minutes, until the kale starts to wilt.

Add the heavy cream.  Stir to incorporate and leave on low heat for a couple minutes just to get the soup back up to serving temp.

Makes about 12 servings.

1 Comment

Filed under Soups

Chicken Tortilla Soup

Okay, I know I said I was going to be posting Thanksgiving recipes this week.  I will.  I’m getting there.  But I couldn’t wait another day to share this with you.  I’m so proud of this soup I could take a picture of it.  Oh wait.  I already did that.

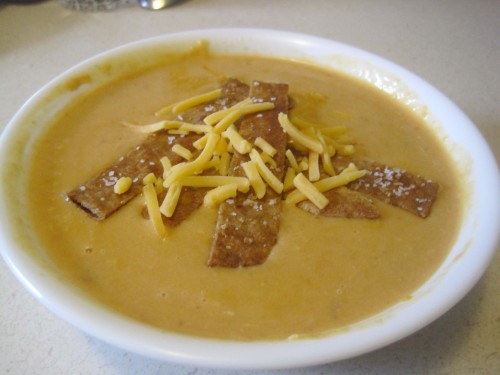
This is Chicken Tortilla Soup and if you are lucky enough to live near a Max & Erma’s restaurant you know the addictive lure of this soup.  It’s spicy and hearty, cheesy and creamy.  And it’s topped with fried tortilla strips and shredded cheddar.

The tortilla in this picture?  Yeah, it’s actually a wheat tortilla.  Not gonna lie.  I made this bowl for me.  If I were making this for my husband I would have simply subbed in a fried corn tortilla.  Or, as I’ve done every time I’m in a rush… tortilla chips.  It’s totally NOT the same but my husband doesn’t care.  He just wants it under his mouth as soon as possible.

Years ago, in the days when it took me ten times longer to cook everything because I had to re-read the recipe over and over again, I found a copycat for this soup online.  When we went gluten free 3 years ago I looked at that recipe in my binder sadly thinking I would never make it again.  The basis for the soup – 2 cans EACH Cream of Chicken, Cream of Celery, Cream of Mushroom, and Cheddar Cheese Soup.

Excuse me while I go vomit.

Looking back I can’t even believe we ate that.  Every one of those canned soups has wheat as one of the main ingredients.  But we don’t need no stinkin’ wheat to make soup!  And we don’t need 8 cans of over-processed, over-salted, gelatinous yuck to start it either.  We’re gonna start this the way we start all our soups.  With some oil in a pot, some chopped onion, and some garlic.

…and all this other stuff (minus the pumpkin).  You’ll also need a whole rotisserie chicken – meat torn off and separated into dark and white, one carrot, two celery stalks, cornstarch, cayenne, salt, pepper, chicken broth, a can of diced tomatoes, a can of diced green chiles, shredded cheddar cheese, and Half and Half. (And fresh cilantro and tortillas for frying, not shown, oops.)

To start, dice one carrot, two stalks of celery, and a medium onion.  Mince four cloves of garlic.

Heat 2 Tbsp vegetable oil over Medium-High heat and saute onions, carrots, and celery until soft, about six minutes depending how large your dice is.  Add in minced garlic and cook 60 seconds more.  No more – you don’t want to burn the garlic.  Burnt garlic will ruin a dish.

Add in 1/4 cup of cornstarch.  You can see how carefully I measured that.  It’s fine in this case, actually.  Soup is forgiving.  Mix to coat the vegetables and cook for a minute or so.  Season with 1 tsp salt, 1/4 tsp cayenne, and some freshly ground black pepper.  Don’t skimp on the salt!!!

Now, for those cans.  Dump in the tomatoes, green chiles, four cups of chicken broth…and all your dark meat.  Sorry for the lack of pictures.  I probably had a child glued to my shin at this point.  Bring up to a simmer, cover it, turn the heat down, and walk away for the next 25 minutes.

After 25 minutes, remove soup from the heat, grab your immersion blender and puree it all up nice and smooth.  Don’t have an immersion blender?  You can do the same thing in your food processor or blender in batches. (Small amounts at a time so hot soup doesn’t splatter out of the blender.  Been there.  Done that.  Wouldn’t want to make that mistake again.)

Lastly we’re going to add in our cheddar cheese, half and half, the chopped white meat, and a good handful of chopped cilantro.  Add the cheese in slowly so you don’t end up with one big gob of cheese in your soup.  Keep your soup on Med-Low just long enough to get it back up to temp.

This tortilla has already been fried.  Frying tortillas for garnish is both necessary and easy.  Just heat a shallow pool of oil in a pan over Medium-High heat until the oil shimmers (but not smokes).  Place your tortilla in the oil.  The oil should sizzle and bubble excitedly when you introduce the tortilla.  Fry it for a minute or two on each side, until the tortilla is crisp.  Just don’t walk away from it and it’s fairly foolproof.  Salt and drain on a paper towel lined plate.  Obviously, if you’re cooking for more people than just yourself you can make as many tortillas as you want this way.

Then just slice them up into strips…

…and throw them and some more cheddar cheese on top of your hot soup.

Ahh, so yummy.  I love this soup.  I would proudly and happily serve this to my kids, my boss, my friend the dietician – anyone looking for a hot bowl of contentment.  Enjoy!


Chicken Tortilla Soup

1 whole rotisserie chicken, meat removed, separated into dark and white, and chopped

2 Tbsp vegetable oil

1 carrot, diced

2 stalks celery, diced

1 medium onion, diced

4 cloves garlic, minced

1/4 cup cornstarch

1 tsp salt

Freshly Ground Black Pepper

1/4 tsp Cayenne Pepper

1 4oz can Diced Green Chiles

1 15oz can Diced Tomatoes

4 cups chicken broth

2 cups (8oz) shredded cheddar

1 cup half and half

1/4 cup fresh cilantro, chopped

4 tortillas (corn or wheat)

1/2 cup vegetable oil

Instructions:

Heat oil in a large stockpot over Medium-High heat.  Add diced onion, carrot, and celery and saute until soft, about 6 minutes. Add in garlic, saute 60 seconds more.

Add cornstarch to vegetables and toss to coat.  Cook for 1 minute more.  Season with salt, pepper, and cayenne.

Add chicken broth, tomatoes, green chiles, and the dark meat and bring to a simmer.

Cover and turn heat down to low.  Allow to simmer for 25 minutes.

Remove from heat and puree soup using an immersion blender (or in your food processor or blender in small batches).

Add cheddar cheese in slowly, stirring to combine well.  Add in half and half, all the white meat, and the cilantro.  Leave on Medium-Low heat just until soup gets hot again.

Garnish with tortilla strips and more shredded cheddar and cilantro if desired.

For Tortilla Strips:

Heat a shallow pool of oil in a pan over Medium-High heat until the oil shimmers (but not smokes).

Place one tortilla in the oil.  The oil should sizzle and bubble excitedly when the tortilla is introduced.  Fry for 1-2 minutes on each side, until the tortilla is crisp.

Salt and drain on a paper towel lined plate.

Slice into strips.

1 Comment

Filed under Soups

Cheesy Loaded Potato Soup

I was not intending on posting this soup when I made it the other night.  Hence the lack of pictures.  But it was sooooooo good I had to share.  Every single person in my house actually tried this.  I know that doesn’t sound big but trust me, IT IS.

This is slightly adapted from a recipe on Food Network.com.  There’s even a video there that you can watch.  It was super easy – I watched the video and then was free to just cook and not worry about reading a recipe.

I have grown to hate reading recipes.  Whenever possible I freehand stuff.  Or if I’m baking, I memorize the recipe before I start so I don’t have to constantly be going back and forth, making sure I’ve gotten all the steps in right.  This, I think, has to be the dividing line between beginner home cook and intermediate.  Getting to the point where you know enough to cook intuitively is an AMAZING feeling.  So freeing.

Anyway, just one last thing I have to point out on this soup – for those of you that are calorie conscious – this soup is NOT cream based.  It is super rich and soul-statisfyingly thick to be sure, but the calorie count is actually pretty reasonable.  Which leaves room for lots of yummy toppings!  Sour cream, shredded cheddar, chopped crisply-cooked bacon, chives – whatever you like on your baked potato is awesome as a garnish on this soup.

So good.  So quick and easy.  And you probably have everything you need to make it in your kitchen right now.

So go.  Do.  Have fun.  And enjoy!

Fully Loaded Cheesy Potato Soup (slightly adapted from Food Network.com)

3 Tbsp butter

1 onion, finely chopped

1 carrot, finely chopped

2 celery stalks, finely chopped

2 cloves garlic, finely chopped

1/4 cup All Purpose Gluten Free Flour Blend (or regular flour if you can eat gluten)

1 tsp Kosher Salt

Freshly Ground Black Pepper

3 cups chicken broth

1 cup whole milk

2 large russet potatoes, peeled and chopped

2 cups (8oz) shredded cheddar cheese

A few dashes Tabasco

A few dashes Worcestershire sauce (check the label for gluten if this is of concern to you)

Sour cream, chopped chives, crumbled bacon, more shredded cheddar for topping

Instructions:

In a large saucepan melt butter over medium heat.

Add celery, onion, carrot and garlic and saute until softened, about 5 minutes.

Stir in flour to coat vegetables.  Cook a couple minutes to toast the flour.

Gradually stir in broth and milk.  Turn heat up to medium high and add potatoes, salt, and pepper.

Bring to a boil, turn down the heat, cover, and leave it for 25 minutes (or until your potatoes are fork tender).

Prepare your garnishes during this time.

When potatoes are tender, puree soup using an immersion blender (or transfer to a food processor or blender) and blend until smooth.

Add in cheese gradually (so you don’t get one big lump of cheddar in your soup).

Season to taste with Tabasco and Worcestershire.  Taste and add more salt if necessary.  (Never under-salt soup!)

Garnish as desired and serve hot.

Makes 6 modest servings.  (Or 4 enormous ones.  Take your pick.)

(One more note:  The original recipe calls for a 12oz bottle of beer.  You can certainly sub in a gluten free bottle of beer like Redbridge or Bard’s if you like.  It doesn’t need it and since I’m not a big fan of beer (even in cooking) I left it out.)

Leave a comment

Filed under Soups

White Chicken Chili

It has been a crazy week.  Back to school.  Back to activities.  Back to the grind of everyday life.  Add in the change of seasons and trying to adjust to the suddenly chilly weather we’ve had these last few days and this lady is ready for something easy to throw together in the kitchen.  Something warm and comforting.  Something homey.  Something like…

Chili.  When the weather gets colder I think it’s probably one of the first things we all start thinking about making again.  There are a million different ways to make it and not a one of them is wrong.  I’ve made two different kinds in the last week.  This one, my White Chicken Chili, and also a more traditional, ground beef chili.

I love this recipe because it’s quick, easy, and economical.  It is the perfect way to use up leftover rotisserie chicken.  Every time we get one from the grocery store we always have tons leftover (usually all the dark meat), which is perfect for throwing into soup.   Everyone in my house (besides my eight year old who does not eat anything that does not consist solely of bread and cheese) loves this chili.  Let’s face it, my family will eat anything that can be devoured by way of tortilla chip so this works out very well.

Let’s get started.

First, chop up a large onion.

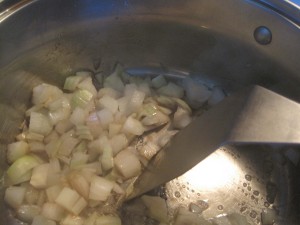
Throw your onions into a large pot over Med-High heat with 2 tsp of butter and saute until soft.

This next part’s gonna go quickly so pay attention.  Here are the major flavor players in your chili.  Lime juice, garlic, fire-roasted green chiles, Cayenne Pepper, Ancho Chili Powder, Cumin, Ground Coriander, and of course, Kosher Salt and Freshly Ground Black Pepper.

Add2 tsp garlic (four cloves, minced, if you’re feeling more ambitious than I was yesterday) and all the spices to the onions and toast for just a minute until they become fragrant.  Then add in 2 Tbsp lime juice, the whole can of chiles…

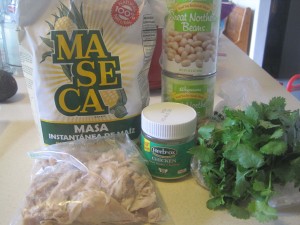
…4 cups of chicken broth, and 1 can of white beans, drained and rinsed.    I use bouillon to make broth most of the time.  It takes up less space than cans!  Excuses…sigh.  I know.  Anyway.  We’ll get to the Masa, chicken, and cilantro in just a minute.  (I didn’t exactly plan on blogging this until I was already making it in case you couldn’t already tell.)

But wait, why are there two cans of beans???  Glad you asked!  When you drain and rinse your beans leave half of them in the strainer and mash them up into a thick paste.  You’re going to throw them in like that and they will break down even further as they cook.  This way your chili is not only thicker but has twice the antioxidants and good-for-you-ness of the beans without being super beany!

My spell checker says “beany” is not a word.  I disagree.

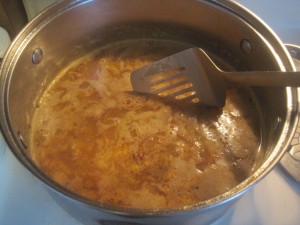
So now we’ve added our broth, lime juice, chiles, beans, spices, and garlic to our onions.  We’re gonna let that come back up to a simmer, turn the heat down to low, cover it partially, and walk away for the next 20 minutes.

In that time we’ll get our fixins together!  Here I have shredded Monterrey Jack cheese, sour cream, tortilla chips, and some slices of ripe avocado.  Mmm.

Beware, putting the chips on the table before dinner is ready is a bona fide invitation to the kids to come eat chips before dinner is ready.  “I eatin’ chips mom!”

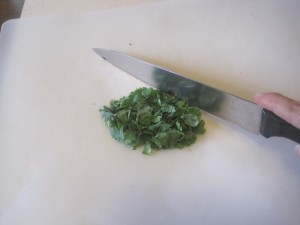
Now let’s grab that cilantro and chop it up.  You’ll need 1/4 cup for the soup and then more if you want some for garnish.

And lastly, grab your bag of Masa (corn flour found in the Latino section of the supermarket).  Mix 1/4 cup Masa with 1/2 cup of water.  Doesn’t that look appetizing…

There it is all mixed up looking…still not so appetizing.  I promise there is a reason for this.

Mix in the chopped cilantro, the chicken, and the Masa slurry.  The Masa will give the chili a real nice texture as well as make it a lot easier for little people to eat without spilling it all over themselves.  Now, just heat it for a minute to get it back up to steamy hot.

And serve.  This is how I like mine.  But you can do yours however you like.  That’s the beauty of chili.  That and the fact that it’s even better the next day.  It’s spicy and hearty, bright with lime and cilantro.  A little bit smoky with the Ancho Chili Powder.  It has so many different flavor notes – probably why of all the Chicken Chilis I’ve ever had this is my favorite.  Snuggle up and enjoy.

White Chicken Chili

1 Tbsp vegetable oil

1 large onion, chopped

4 garlic cloves, minced

Kosher Salt and Freshly Ground Black Pepper, to taste

1 Tbsp Cumin

1 1/2 tsp Ground Coriander

1 tsp Ancho Chili Powder

1/4 tsp Cayenne Pepper

4 cups chicken broth

2 Tbsp lime juice

1 (4oz) can Diced Green Chiles

1/2 Rotisserie Chicken, skin removed and meat shredded (dark meat or white/dark mix)

2 (14.5oz) cans white beans

1/4 cup Masa (corn flour)

1/4 cup fresh cilantro, chopped, plus more for garnish if desired

Optional toppings:

Sour Cream

Monterrey Jack Cheese, shredded

Avocado, sliced

Tortilla Chips

Instructions:

Drain and rinse white beans.  Mash half the beans with a fork.  Set aside.

Preheat a large pot over Med-High heat.  Add two Tbsp butter and the chopped onions.  Saute until soft.

Add garlic and spices to onions and cook for one minute.

Add entire can of green chiles, lime juice, chicken broth, and all the beans (whole and mashed).  Bring chili up to a simmer, reduce heat to low and let simmer for 20 minutes.

In a small bowl, combine Masa with 1/2 cup water.

Add chicken, cilantro, and Masa slurry to chili and simmer until heated through.

Serve hot with optional toppings.

Makes 6 cups.


2 Comments

Filed under Soups

Roasted Tomato Soup

It’s tomato season.  Every year about this time our kitchen gets overrun with tomatoes and peppers from our gardens.  Roma tomatoes, beefsteak tomatoes, bell peppers, jalapenos, scorching little Thais, terrifyingly hot Habaneros…it depends from year to year.  This year we also did a lot of herbs, some berries, canteloupe, watermelon, and peaches too.

But the big news in late August is always TOMATOES.  Last year we counted over 600 ripe red beauties brought into our little kitchen.   This is what I picked last night.

These are just the Romas.  I could have picked twice that many but it was 7 o’clock in the evening and I got five mosquito bites in the five minutes it took me to pick these.  Mosquitoes ❤ me.

Anyway.  With all the tomatoes we get I make a ton of tomato themed yummies this time of year.  And I always make my Roasted Tomato Soup.  If, when I say, “Tomato Soup”, the only thing you can imagine is the canned stuff you mix with water then you really really need to make this soup.  It is so not even in the same ballpark as the canned slop.  Rich with cream and complex with the flavor of the roasted, caramelized fresh tomatoes, it will totally change the way you think about tomato soup.  And it’s healthy to boot!  It’s broth based so it’s low in calories.  All right, let’s get started.

First, arrange fresh roma tomatoes on a rimmed baking sheet.  You definitely want to use a rimmed one as there will be juice on it in a few minutes.  (No need to cut the tomatoes in half like I did.  My Romas, which are normally so bug/fungus/disease resistant, got some kind of a blight this year and I wanted to make sure they were all okay inside before roasting them.)  I used about 25 smallish ones.  I usually just eyeball it.  You need enough to cover somewhere between half and the whole pan.  You’ve got some wiggle room.  Drizzle them with some olive oil and sprinkle generously with kosher salt and freshly ground black pepper.  What?  you don’t have kosher salt and a pepper grinder in your kitchen?  Regular salt and pepper are fine, as they are with most of the recipes you see those ingredients called for.  We can talk about how and when they are better at a later date.  Right now I’ve got babies wakin’ up so let’s keep a movin’ here.

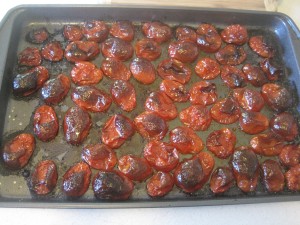
Here they are after being roasted in a 400 degree oven for about 45 minutes.  It’s getting cooler now so you can do that and not worry about your A/C kicking back on.  (YAY!)  Coincidence that tomatoes ripen just as the temperature abruptly drops???  I think so :p  Anyway, that’s what they will look like, roughly, after you finish roasting them.  Shriveled, with brown spots.  These may have been in a little longer than usual.  This is what happens when you’re trying to cook and take pictures with the better half of a daycare hanging around your calves.

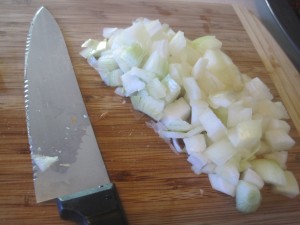
Next, grab a couple of cooking onions and chop them up.  They should be roughly uniform so that they cook evenly but in the end they’re just going to get pureed so don’t stress over perfection.  Actually don’t stress ever.  It’s food.

Next, chop up a couple cloves of garlic.  Or you can use a teaspoon of the jarred pre-minced stuff.  I promise I don’t judge.

Put a stockpot on medium high and melt some butter.

What’s that brown stuff in the pan?  Oh, that would be the remnants of the first chunk of butter I threw in after I let the pan get WAY too hot whilst fiddling around with my camera.  Fail.  This multitasking stuff is hard work.  So assuming you didn’t just fill YOUR kitchen up with smoke like I did we should be good to go.

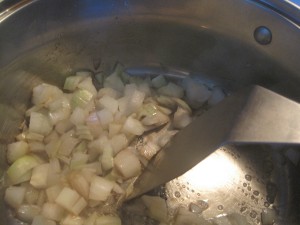
Throw in your onions and cook until they’re nice and soft and getting translucent, a few minutes or so.

Kinda like that.

Next, toss in your garlic and cook for just a minute or so.

Add in a teaspoon of salt and a half teaspoon black pepper.  Don’t skimp on the salt!  Tomatoes take a lot of salt.  Oh, and yes, you caught me.  I did not totally free hand this one.  This recipe is adapted from one I found in Family Fun Magazine a few years back.  That’s my tattered recipe binder in the bottom left corner there.  One of my most prized possessions to be sure.  Anyway.  Where was I?

Oh yeah, open up a big can of tomatoes (you can use diced or whole or whatever you have lying around – even fresh if you’re drowning in garden tomatoes) and throw them in the pot.

Add a quart of chicken broth.

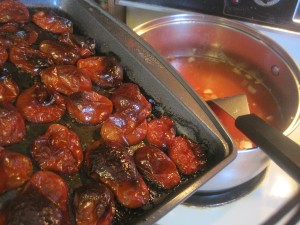
And all the roasted tomatoes and any juices from the pan.

And finally some Thyme.  Fresh is great if you have it.  I did but I was too lazy/overwhelmed at the moment to deal with it.  Shortcuts can be a good thing.  Say it with me.  Shortcuts can be good.

Now just bring it up to a simmer, turn down the heat, cover it partially, and walk away.  And if you’re like me you’ll need to set a timer so you don’t wake up at 11 o’clock wondering why the house smells like food.

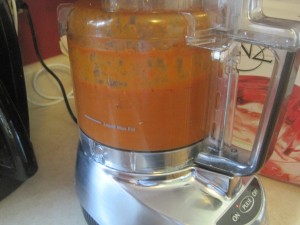
After about 40 minutes turn off the heat and carefully ladle your soup into your food processor or blender.  Or you can use an immersion blender but I don’t think it does as good of a job on this particular soup.  You really want to blend it well so that you can taste the wonderful caramelized, roasted tomatoes but not get the skins stuck in your teeth.

Caution:  You see that little white line towards the bottom of the food processor?  That’s the “don’t even think about putting liquids in above this line” line.  It’s actually running in this shot, that’s why it looks so full.  Small batches.  Trust me.  I used to do this in my blender and, unless you like getting splattered with boiling hot soup, I’d advise you not fill it too full.

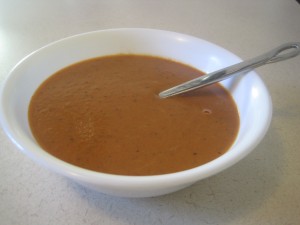
Now that your soup is totally pureed you can pour it back into the stockpot (or a bowl as I did here since we were not going to be eating it right away) and add in a cup of heavy cream.  It will turn a nice orange color.  Heat it on low just to get it steamy again.

And enjoy.  Creamy (this could have actually used a little more cream) and wildly flavorful, it goes wonderfully with a salad, sandwich, crackers, bread.  Whatever you like and can eat.

Roasted Tomato Soup (adapted from Family Fun Magazine)

20ish Roma tomatoes or 6 cups cherry tomatoes

2 Tbsp olive oil

Kosher Salt and Freshly Ground Black Pepper

2Tbsp Butter

2 cooking onions, chopped

2 cloves garlic, chopped

1 28oz can diced tomatoes

4 cups chicken broth

1/2 tsp Thyme

1 cup heavy cream

Instructions:

Preheat the oven to 400 degrees.

Toss fresh tomatoes with olive oil and salt and pepper on a rimmed baking sheet and roast for about 45 minutes.

Heat a large stockpot over medium high.  Melt the butter and add the chopped onions.  Cook until translucent, about 5 minutes.  Add the garlic and cook another minute.

Pour in the chicken broth, canned tomatoes, roasted tomatoes, 1/2 tsp Thyme, 1 tsp kosher salt and 1/2 black pepper to the mix.  Bring to a simmer and cover, partially, for 40 minutes.

Carefully ladle soup into food processor or blender and puree until smooth (or use an immersion blender to get the same effect).  Return soup to the pot and add the heavy cream.  Warm back up to temp and serve.

Serves 12 (ish).

7 Comments

Filed under Soups